- Show support on Youtube: https://www.youtube.com/@ChuckBuilds
- Check out the write-up on my website: https://www.chuck-builds.com/led-matrix/
- Stay in touch on Instagram: https://www.instagram.com/ChuckBuilds/
- Want to chat? Reach out on the ChuckBuilds Discord: https://discord.com/invite/uW36dVAtcT
- Feeling Generous? Buy Me a Coffee : https://buymeacoffee.com/chuckbuilds
- Hzeller @ GitHub for his groundwork on controlling an LED Matrix from the Raspberry Pi
- Basmilius @ GitHub for his free and extensive weather icons
- nvstly @ GitHub for their Stock and Crypto Icons
- ESPN for their sports API
- Yahoo Finance for their Stock API
- OpenWeatherMap for their Free Weather API
- Randomwire @ https://www.thingiverse.com/thing:5169867 for their 4mm Pixel Pitch LED Matrix Stand
Core Features
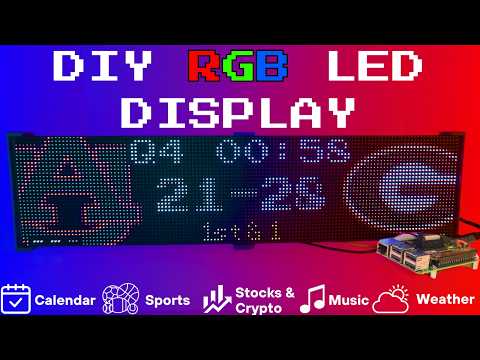
The following plugins are available inside of the LEDMatrix project. These modular, rotating Displays that can be individually enabled or disabled per the user's needs with some configuration around display durations, teams, stocks, weather, timezones, and more. Displays include:-
Real-time clock display (2x 64x32 Displays 4mm Pixel Pitch)

-
Current Weather, Daily Weather, and Hourly Weather Forecasts (2x 64x32 Displays 4mm Pixel Pitch)


-
Google Calendar event display (2x 64x32 Displays 4mm Pixel Pitch)

The system supports live, recent, and upcoming game information for multiple sports leagues:
-
NHL (Hockey) (2x 64x32 Displays 4mm Pixel Pitch)


-
NBA (Basketball)
-
MLB (Baseball) (2x 64x32 Displays 4mm Pixel Pitch)

-
NFL (Football) (2x 96x48 Displays 2.5mm Pixel Pitch)

-
NCAA Football (2x 96x48 Displays 2.5mm Pixel Pitch)

-
NCAA Men's Basketball
-
NCAA Men's Baseball
-
Soccer (Premier League, La Liga, Bundesliga, Serie A, Ligue 1, Liga Portugal, Champions League, Europa League, MLS)
-
(Note, some of these sports seasons were not active during development and might need fine tuning when games are active)
- Near real-time stock & crypto price updates
- Stock news headlines
- Customizable stock & crypto watchlists (2x 64x32 Displays 4mm Pixel Pitch)


- Music playback information from multiple sources:
- Spotify integration
- YouTube Music integration
- Album art display
- Now playing information with scrolling text (2x 64x32 Displays 4mm Pixel Pitch)


-
Custom Text display (2x 64x32 Displays 4mm Pixel Pitch)

-
Youtube Subscriber Count Display (2x 64x32 Displays 4mm Pixel Pitch)

Hardware Requirements
## Hardware Requirements- Raspberry Pi 3B or 4 (NOT RPi 5!)
Amazon Affiliate Link – Raspberry Pi 4 4GB RAM Amazon Affiliate Link – Raspberry Pi 4 8GB RAM
- Adafruit RGB Matrix Bonnet/HAT – supports one “chain” of horizontally connected displays
- Adafruit Triple LED Matrix Bonnet – supports up to 3 vertical “chains” of horizontally connected displays (use
regular-pi1as hardware mapping) - Electrodragon RGB HAT – supports up to 3 vertical “chains”
- Seengreat Matrix Adapter Board – single-chain LED Matrix (use
regularas hardware mapping)
(2x in a horizontal chain is recommended)
- Adafruit 64×32 – designed for 128×32 but works with dynamic scaling on many displays (pixel pitch is user preference)
- Waveshare 64×32 - Does not require E addressable pad
- Waveshare 92×46 – higher resolution, requires soldering the E addressable pad on the Adafruit RGB Bonnet to “8” OR toggling the DIP switch on the Adafruit Triple LED Matrix Bonnet (no soldering required!)
Amazon Affiliate Link – ChuckBuilds receives a small commission on purchases
- 5V 4A DC Power Supply (good for 2 -3 displays, depending on brightness and pixel density, you'll need higher amperage for more)
- 5V 10A DC Power Supply (good for 6-8 displays, depending on brightness and pixel density)
- By soldering a jumper between pins 4 and 18, you can run a specialized command for polling the matrix display. This provides better brightness, less flicker, and better color.
- If you do the mod, we will use the default config with led-gpio-mapping=adafruit-hat-pwm, otherwise just adjust your mapping in config.json to adafruit-hat
- More information available: https://github.com/hzeller/rpi-rgb-led-matrix/tree/master?tab=readme-ov-file

- Some LED Matrix displays require an "E" addressable line to draw the display properly. The 64x32 Adafruit display does NOT require the E addressable line, however the 92x46 Waveshare display DOES require the "E" Addressable line.
- Various ways to enable this depending on your Bonnet / HAT.
Your display will look like it is "sort of" working but still messed up.
 or
or
 or
or

How to set addressable E line on various HATs:
- Adafruit Single Chain HATs
 or
or

-
Adafruit Triple Chain HAT

-
ElectroDragon RGB LED Matrix Panel Drive Board

2 Matrix display with Rpi connected to Adafruit Single Chain HAT.

Mount / Stand options
I 3D printed stands to keep the panels upright and snug. STL Files are included in the Repo but are also available at https://www.thingiverse.com/thing:5169867 Thanks to "Randomwire" for making these for the 4mm Pixel Pitch LED Matrix.
Special Thanks for Rmatze for making:
- 3mm Pixel Pitch RGB Stand for 32x64 Display : https://www.thingiverse.com/thing:7149818
- 4mm Pixel Pitch RGB Stand for 32x64 Display : https://www.thingiverse.com/thing:7165993
These are not required and you can probably rig up something basic with stuff you have around the house. I used these screws: https://amzn.to/4mFwNJp (Amazon Affiliate Link)
Preparing the Raspberry Pi
- Create RPI Image on a Micro-SD card (I use 16gb because I have it, size is not too important but I would use 8gb or more) using Raspberry Pi Imager
- Choose your Raspberry Pi (3B+ in my case)
- For Operating System (OS), choose "Other", then choose Raspbian OS (64-bit) Lite

- For Storage, choose your micro-sd card

- Press Next then Edit Settings

- Inside the OS Customization Settings, choose a name for your device. I use "ledpi". Choose a password, enter your WiFi information, and set your timezone.

- Under the Services Tab, make sure that SSH is enabled. I recommend using password authentication for ease of use - it is the password you just chose above.

- Then Click "Save" and Agree to Overwrite the Micro-SD card.
System Setup & Installation
SSH into your Raspberry Pi and paste this single command:
curl -fsSL https://raw.githubusercontent.com/ChuckBuilds/LEDMatrix/main/scripts/install/one-shot-install.sh | bashThis one-shot installer will automatically:
- Check system prerequisites (network, disk space, sudo access)
- Install required system packages (git, python3, build tools, etc.)
- Clone or update the LEDMatrix repository
- Run the complete first-time installation script
The installation process typically takes 10-30 minutes depending on your internet connection and Pi model. All errors are reported explicitly with actionable fixes.
Note: The script is safe to run multiple times and will handle existing installations gracefully.
Manual Installation (Alternative)
If you prefer to install manually or the one-shot installer doesn't work for your setup:
- SSH into your Raspberry Pi:
ssh ledpi@ledpi- Update repositories, upgrade Raspberry Pi OS, and install prerequisites:
sudo apt update && sudo apt upgrade -y
sudo apt install -y git python3-pip cython3 build-essential python3-dev python3-pillow scons- Clone this repository:
git clone https://github.com/ChuckBuilds/LEDMatrix.git
cd LEDMatrix- Run the first-time installation script:
chmod +x first_time_install.sh
sudo bash ./first_time_install.sh
This single script installs services, dependencies, configures permissions and sudoers, and validates the setup.
Configuration
Edit the project via the web interface at http://ledpi:5000 or for manual control:
-
First-time setup: The previous "First_time_install.sh" script should've already copied the template to create your config.json:
-
Edit your configuration:
sudo nano config/config.json
or
- Having Issues?: Run the First Time Script again:
sudo ./first_time_install.shThe system automatically handles configuration updates:
- New installations: Creates
config.jsonfrom the template automatically - Existing installations: Automatically adds new configuration options with default values when the system starts
- Backup protection: Creates a backup of your current config before applying updates
- No conflicts: Your custom settings are preserved while new options are added
Everything is configured via config/config.json and config/config_secrets.json. The config.json file is not tracked by Git to prevent conflicts during updates.
Details
I recommend using the web-ui to control the Display but you can also run the following commands via ssh:From the project root directory:
sudo python3 display_controller.pyThis will start the display cycle but only stays active as long as your ssh session is active.
Run on Startup Automatically with Systemd Service Installation
The first time install will handle this: The LEDMatrix can be installed as a systemd service to run automatically at boot and be managed easily. The service runs as root to ensure proper hardware timing access for the LED matrix.
Details
1. Make the install script executable: ```bash chmod +x scripts/install/install_service.sh ```- Run the install script with sudo:
sudo ./scripts/install/install_service.shThe script will:
- Detect your user account and home directory
- Install the service file with the correct paths
- Enable the service to start on boot
- Start the service immediately
Details
The following commands are available to manage the service:# Stop the display
sudo systemctl stop ledmatrix.service
# Start the display
sudo systemctl start ledmatrix.service
# Check service status
sudo systemctl status ledmatrix.service
# View logs
journalctl -u ledmatrix.service
# Disable autostart
sudo systemctl disable ledmatrix.service
# Enable autostart
sudo systemctl enable ledmatrix.serviceConvenience Scripts
Two convenience scripts are provided for easy service management:
start_display.sh- Starts the LED matrix display servicestop_display.sh- Stops the LED matrix display service
Make them executable with:
chmod +x start_display.sh stop_display.shThen use them to control the service:
sudo ./start_display.sh
sudo ./stop_display.shThe first time install will handle this: The LEDMatrix system includes Web Interface that runs on port 5000 and provides real-time display preview, configuration management, and on-demand display controls.
- Make the install script executable:
chmod +x install_web_service.sh- Run the install script with sudo:
sudo ./install_web_service.shThe script will:
- Copy the web service file to
/etc/systemd/system/ - Enable the service to start on boot
- Start the service immediately
- Show the service status
The web interface can be configured to start automatically with the main display service:
- In
config/config.json, ensure the web interface autostart is enabled:
{
    "web_display_autostart": true
}- The web interface will now start automatically when:
- The system boots
- The
web_display_autostartsetting istruein your config
Once installed, you can access the web interface at:
http://your-pi-ip:5000
# Check service status
sudo systemctl status ledmatrix-web.service

# View logs
journalctl -u ledmatrix-web.service -f

# Stop the service
sudo systemctl stop ledmatrix-web.service

# Start the service
sudo systemctl start ledmatrix-web.service

# Disable autostart
sudo systemctl disable ledmatrix-web.service

# Enable autostart
sudo systemctl enable ledmatrix-web.service- Real-time Display Preview: See what's currently displayed on the LED matrix
- Configuration Management: Edit settings through a web interface
- On-Demand Controls: Start specific displays (weather, stocks, sports) on demand
- Service Management: Start/stop the main display service
- System Controls: Restart, update code, and manage the system
- API Metrics: Monitor API usage and system performance
- Logs: View system logs in real-time
Web Interface Not Accessible After Restart:
- Check if the web service is running:
sudo systemctl status ledmatrix-web.service - Verify the service is enabled:
sudo systemctl is-enabled ledmatrix-web.service - Check logs for errors:
journalctl -u ledmatrix-web.service -f - Ensure
web_display_autostartis set totrueinconfig/config.json
Port 5000 Not Accessible:
- Check if the service is running on the correct port
- Verify firewall settings allow access to port 5000
- Check if another service is using port 5000
Service Fails to Start:
- Check Python dependencies are installed
- Verify the virtual environment is set up correctly
- Check file permissions and ownership
Details
LEDMatrix uses a plugin-based architecture where all display functionality (except the core calendar) is implemented as plugins. All managers that were previously built into the core system are now available as plugins through the Plugin Store.The easiest way to discover and install plugins is through the Plugin Store in the LEDMatrix web interface:
- Open the web interface (
http://your-pi-ip:5000) - Navigate to the Plugin Manager tab
- Browse available plugins in the Plugin Store
- Click Install on any plugin you want
- Configure and enable plugins through the web UI
You can also install plugins directly from GitHub repositories:
- Single Plugin: Install from any GitHub repository URL
- Registry/Monorepo: Install multiple plugins from a single repository
See the Plugin Store documentation for detailed installation instructions.
For plugin development, check out the Hello World Plugin repository as a starter template.
Important for users upgrading from older versions:
-
Script Path Reorganization: Installation scripts have been moved to
scripts/install/:./install_service.sh→./scripts/install/install_service.sh./install_web_service.sh→./scripts/install/install_web_service.sh./configure_web_sudo.sh→./scripts/install/configure_web_sudo.sh
If you have automation, cron jobs, or custom tooling that references these scripts, you must update them to use the new paths. See the Migration Guide for complete details.
-
Built-in Managers Deprecated: The built-in managers (hockey, football, stocks, etc.) are now deprecated and have been moved to the plugin system. You must install replacement plugins from the Plugin Store in the web interface instead. The plugin system provides the same functionality with better maintainability and extensibility.
Display Settings from RGBLEDMatrix Library
If you are copying my setup, you can likely leave this alone.
- hardware: Configures how the matrix is driven.
- rows, cols, chain_length: Physical panel configuration.
- brightness: Display brightness (0–100).
- hardware_mapping: Use "adafruit-hat-pwm" for Adafruit bonnet WITH the jumper mod. Remove -pwm if you did not solder the jumper.
- pwm_bits, pwm_dither_bits, pwm_lsb_nanoseconds: Affect color fidelity.
- limit_refresh_rate_hz: Cap refresh rate for better stability.
- runtime:
- gpio_slowdown: Tweak this depending on your Pi model. Match it to the generation (e.g., Pi 3 → 3, Pi 4 -> 4).
- display_durations:
- Control how long each display module stays visible in seconds. For example, if you want more focus on stocks, increase that value.
- Each module (weather, stocks, crypto, calendar, etc.) has enabled, update_interval, and often display_format settings.
- Sports modules also support test_mode, live_update_interval, and favorite_teams.
- Logos are loaded from the logo_dir path under assets/sports/...