This application was created as a project that is part of bachelor thesis and was used to analyze different message bus solutions for the Xolution.
- One of the following windows versions:
- Windows 11 64-bit (Home, Pro, Enterprise or Education) 21H2 or higher
- Windows 10 64-bit (Home or Pro) 21H1 (build 19043) or higher
- Windows 10 64-bit (Enterprise or Education) 20H2 (build 19042) or higher
- RAM: 5 GB
- Display resolution: 1024 by 768 or higher
To run MessageBusTestingApp locally, you need to have these applications installed and setup correctly:
- Visual Studio 2022
- Windows Subsystem for Linux (WSL)
- Docker
- Download Visual Studio 2022 from this link
- Community edition is enough
- Open downloaded file and let it download and install Visual Studio Installer
- After the installation, a new window should open
- In the
Workloadstab mark.NET desktop development - Go to
Individual componentstab - Mark
.NET 6.0 Runtime (Long Term Support)if it is unmarked - Click
Install - Finish setup according to your preference
- Open Visual Studio Installer
- Click
Modifyfor you currently installed Visual Studio 2022 - A new window should open
- In the
Workloadstab mark.NET desktop developmentif it is unmarked - Go to
Individual componentstab - Mark
.NET 6.0 Runtime (Long Term Support)if it is unmarked - Click
Modifyif you changed anything orCloseif everything was set up correctly
- Follow the instructions on this link
- Download Docker Desktop from this link
- Open downloaded file and follow installation wizard
- On the tab
ConfigurationmarkUse WSL 2 instead of Hyper-V (recommended)if it is unmarked
- On the tab
- Start Docker Desktop application (finish setup wizard if you are running application for the first time)
- Open PowerShell and run this command
docker run -it --rm --name rabbitmq -p 5672:5672 -p 15672:15672 rabbitmq:3.11-management - Open project in Visual Studio 2022
- Contact author (514127@mail.muni.cz) to gather connection string used to connect to Azure Service Bus
- Replace
<ADD_CONNECTION_STRING>with the gathered connection string in following files:- Receiver/appsettings.azure-service-bus.json
- Receiver/appsettings.n-service-bus-azure-service-bus.json
- Sender/appsettings.azure-service-bus.json
- Sender/appsettings.n-service-bus-azure-service-bus.json
- Right-click on the Solution
- Select
Common Properties/Startup Projectin the menu - Mark
Multiple startup projectsif it is unmarked - Set
Startaction for Receiver and Sender project - Click
Applyand close the window - Launch application via button with green play button
Testing application allows you to analyze these message bus solutions:
- Azure Service Bus
- Native message bus hosted on Azure Portal
- RabbitMQ
- Native message bus hosted locally on docker container
- NServiceBus with Azure Service Bus transport
- Message bus abstraction from Particular Software
- Physical message bus is hosted on Azure Portal
- NServiceBus with RabbitMQ transport
- Message bus abstraction from Particular Software
- Physical message bus is hosted locally on docker container
If you try to run NServiceBus and a new browser window opens with the question Still in development? follow these instructions:
- Fill in the form with your information
- In the part
I AM DOWNLOADING THIS LICENSE TOselectWork on a project in development - Click
RENEW DEVELOPMENT LICENSE - Check email that you have used in the form
- Follow the instructions in the email from
Particularto renew license - Stop and launch the project again in Visual Studio 2022
Solution consists of 5 projects:
- Receiver
- Console application that simulates application which is responsible for processing messages
- Contains configuration files for all Receiver types
- Sender
- Console application that simulates application which is responsible for sending messages
- Contains configuration files for all Sender types
- Services
- Class library that stores whole logic for each Sender and Receiver type
- Utils
- Class library that stores utility classes
- Contains utility class for console input and output operations
- Contains utility class for operations with enumerations
- Utils.Tests
- Contains tests for utility classes
Each message bus solution offers NuGet packages that provide various clients and interfaces used to communicate with message queues, and options for these clients and their methods. These clients, interfaces and options are used in the project Services within the folder Services.
- Azure Service Bus
ServiceBusClientis used to create additional clients provided via NuGet. Find more on this linkServiceBusProcessoris used to process incoming messages that do not require response. Find more on this linkServiceBusSessionProcessoris used to process incoming message that require response and to process response for sent messages that do not wait for such response. Find more on this linkServiceBusSessionReceiveris used to wait for response to sent message. Find more on this linkServiceBusSenderis used to send messages to the queue. Find more on this link
- RabbitMQ
ConnectionFactoryis used to createIConnectionand setup options for the communication with message queuesIConnectionis used to createIModelIModelrepresents channel, and it is used to declare message queues, set up options for theAsyncEventingBasicConsumer,EventingBasicConsumerand send messages to queueAsyncEventingBasicConsumeris used to process incoming messages- Find more information about these models and interfaces on this link
- NServiceBus
EndpointConfigurationis used to setup current endpoint/application, specify transport, set up recoverability options, create queues and createIEndpointInstanceTransportExtensions<T>is used to setup transport and to connect with message busIEndpointInstanceis used to stop processing of messages and to send messages to queueIHandleMessages<T>is used to define message handler- Find more information about these models and interfaces on this link
You can test various options by modifying them directly in the code and then re-running the application. To learn more about these options, visit the following links:
- Azure Service Bus
- RabbitMQ
- NServiceBus with Azure Service Bus transport
- NServiceBus with RabbitMQ transport
- 2 console windows will open with the welcome screen after the application launch
- One console window represents Receiver and the other one represents Sender
- You can distinguish them by the text in the tab
- You need to press anything to continue in the application
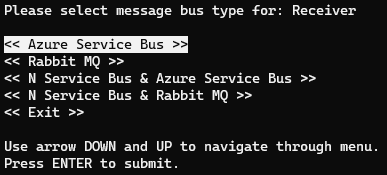
- A menu with message bus solutions will appear after the welcome screen
- You need to pick a specific message bus solution that you want to analyze in both windows
- Nothing bad happens when you select different solution in each window, but for the best analysis it is necessary to select the same solution in both windows
- Receiver will only print information about current activities after the solution selection
- You can press
ESCto exit application anytime - You can press
Cto clear console output anytime
- You can press
- Sender can be used to launch predefined functions that simulate certain situations
- These functions are described below
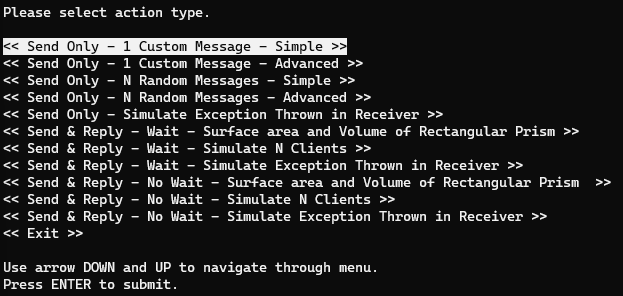
- Simulates sending of the plain text
- You need to provide text of the message
- Message will be sent without serialization
- Simulates sending of the complex object
- You need to provide information about the person and their address (no meaningful texts are required)
- Message will be sent with serialization
- Simulates sending of multiple plain texts at the same time
- You need to provide number of messages that you want to send
- The texts will be randomly generated
- Messages will be sent without serialization
- Simulates sending of multiple complex objects at the same time
- You need to provide number of messages that you want to send
- Complex objects will be randomly generated
- Message will be sent with serialization
- Simulates the exception thrown in receiver for messages that do not need to get response
- You need to provide the attempt on which the exception won't be thrown and the text of the exception
- You can write number 0 or less to simulate a message that will always throw exception
- Simulates sending of a message that needs to get a response, while Sender is waiting synchronously for the response
- You need to provide dimensions of rectangular prism
- Volume and surface area will be calculated in the Receiver and send back to Sender
- Simulates sending a message that needs to get response from multiple clients at the same time, while Sender is waiting synchronously for the response
- You need to provide number of the clients, name for each client (to distinguish them in receiver) and the time in milliseconds which receiver will spend with processing
- Receiver will asynchronously sleep for specified time when receive message and will send a response when it finishes processing
- Simulates the exception thrown in receiver for messages that needs to get a response, while Sender is waiting synchronously for the response
- You need to provide dimensions of rectangular prism, attempt on which exception won't be thrown and the text of the exception
- You can write number 0 or less to simulate a message that will always throw exception
- Volume and surface area will be calculated in the Receiver and send back to Sender when exception won't be thrown
- Simulates sending of a message that needs to get a response, while Sender is not waiting for the response
- You need to provide dimensions of rectangular prism
- Volume and surface area will be calculated in the Receiver and send back to Sender
- Sender has attached handler that handles gathered response and prints it to the console
- Simulates sending a message that needs to get response from multiple clients at the same time, while Sender is not waiting for the response
- You need to provide number of the clients, name for each client (to distinguish them in receiver) and the time in milliseconds which receiver will spend with processing
- Receiver will asynchronously sleep for specified time when receive message and will send a response when it finishes processing
- Sender has attached handler that handles gathered response and prints it to the console
- Simulates the exception thrown in receiver for messages that needs to get response, while Sender is not waiting for the response
- You need to provide dimensions of rectangular prism, attempt on which exception won't be thrown and the text of the exception
- You can write number 0 or less to simulate a message that will always throw exception
- Volume and surface area will be calculated in the Receiver and send back to Sender when exception won't be thrown
- Sender has attached handler that handles gathered response and prints it to the console