Based on the default theme for Ghost. This theme is fully responsive and adapts to any screen size. It is also accessible with screen reader links to relevant site components.
There is a full working site using this theme at cerkit.com. Another example can be found at Storm of Wolves (possibly NSFW on some posts).
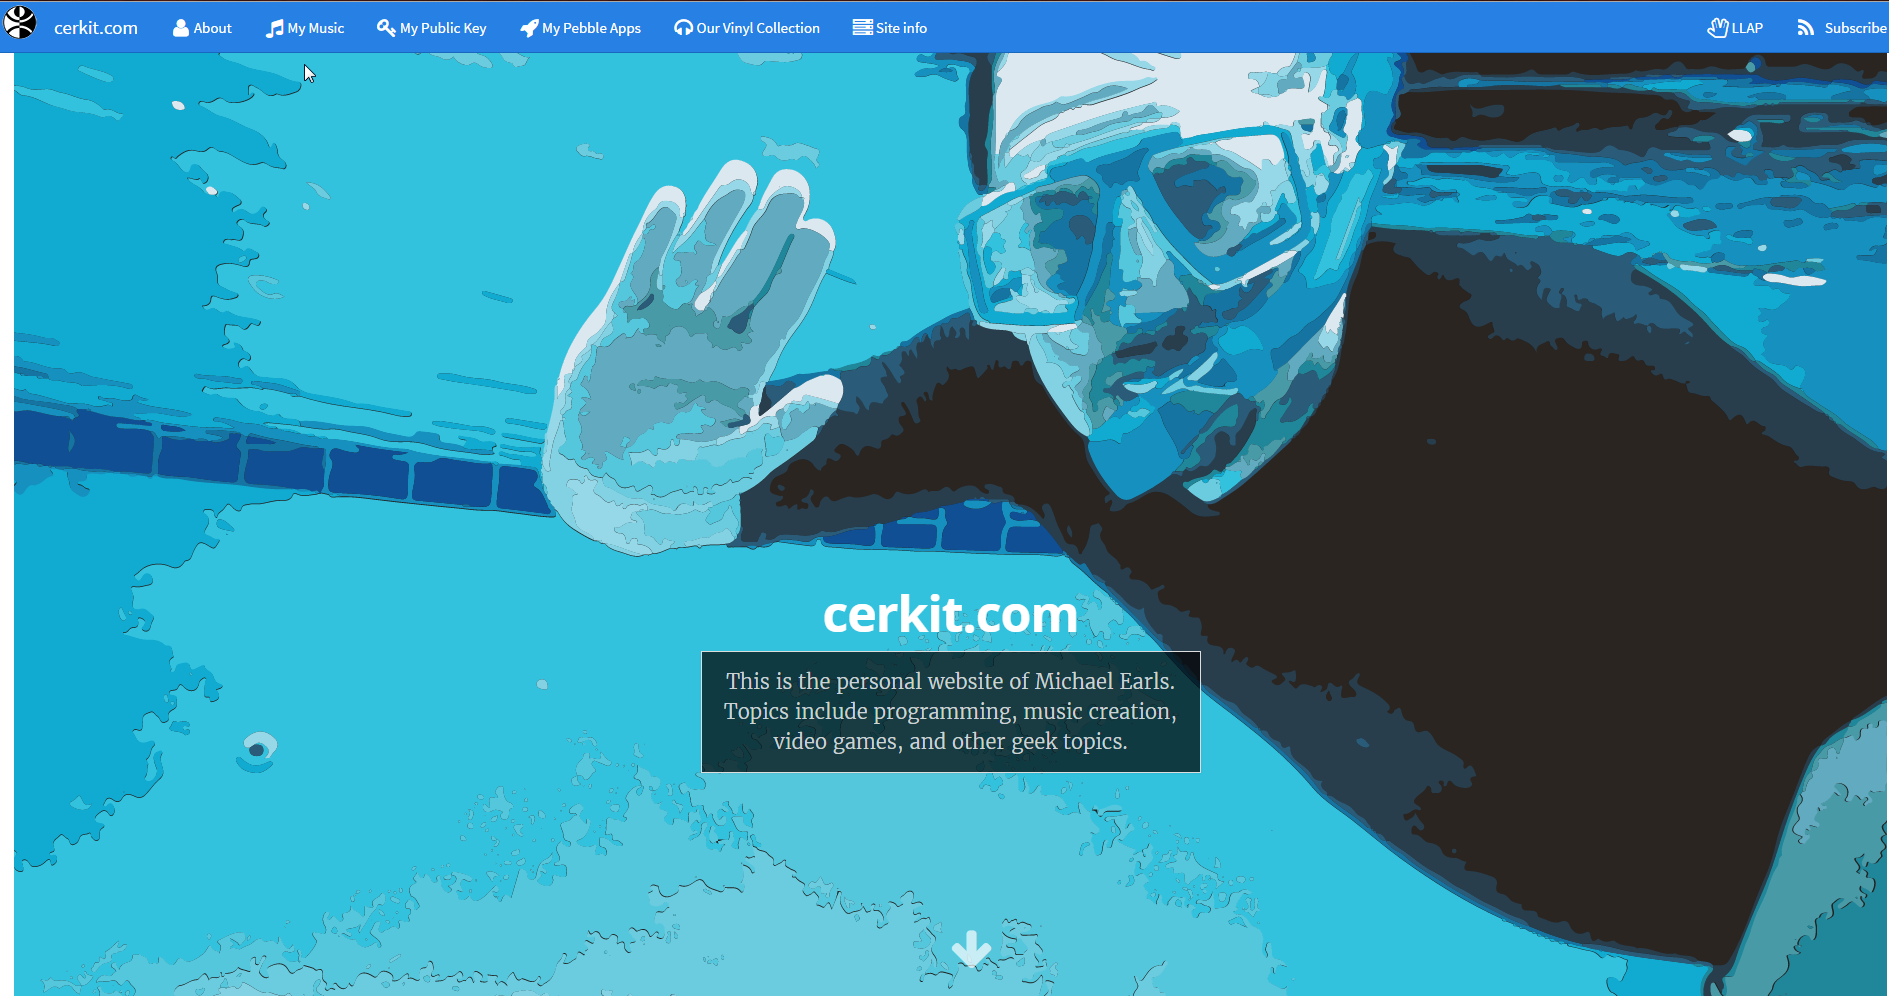
Here is a screenshot of a sample landing page for a site using the theme
Here is a screenshot of a post listing page for a site using the theme

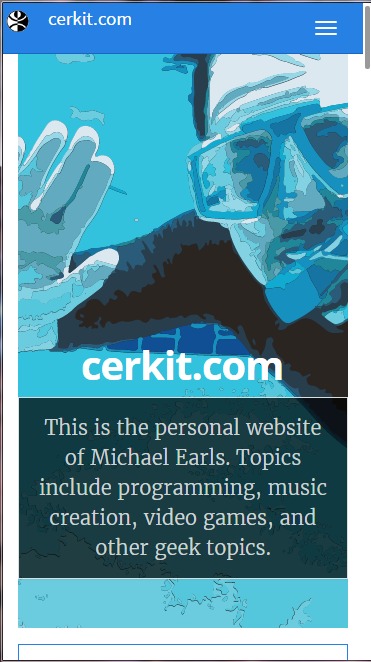
Here is a screenshot of the landing page as seen by an iPhone 6 (portrait):
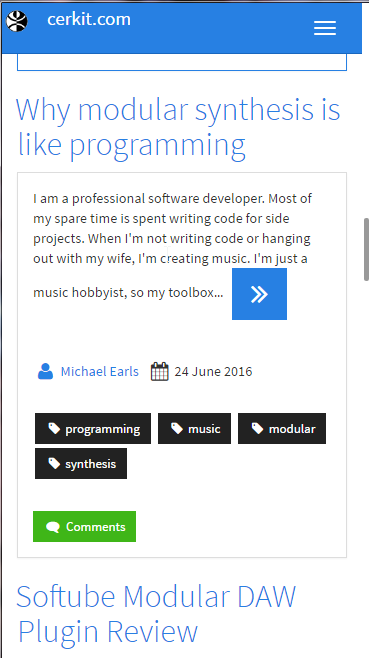
Here is a screenshot of the post list as seen by an iPhone 6 (portrait):
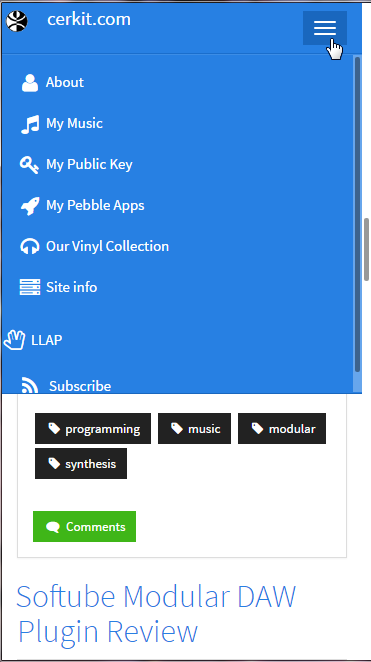
Here is a screenshot of the menu expanded as seen from an iPhone 6 (portrait):
This theme takes advantage of npm. To setup everything in your environment (assuming you have npm installed), follow these steps:
- Clone the repository
- Open a node command line (I am using GitHub's command shell on Windows since it has the environment setup for GitHub)
- CD to the folder where you cloned the repository (or open the shell from the GitHub application).
- type
npm installand press Enter
This will install all of the dependencies that you will need in order to extend this theme.
Once you have installed all of the dependencies, you can simply run gulp from the node command line and it will start watching the css and js folders for changes. When a change is detected, it will concatenate (bundle) and minify (uglify) the code and save it to the src/assets folder (where it is referenced by the default.hbs file and included on all pages).
To get access to a .zip file that you can upload to Ghost pro, simply run gulp zip --name <FILENAME> (without .zip extension)
To deploy the changes to your branch, run gulp deploy --tag <TAGTYPE> from a node command line (after navigating to the theme folder). The file will be saved as dist/ghost-cerkit-theme-distro.zip.
This will also bump the file version number and push to your remote repository. The best way I have found to execute this (on Windows) is to run it with the GitHub shell.
There are three values you can use for --tag:
- patch - increments the patch version:
0.0.X - feature - increments the minor version:
0.X.0 - release - increments the major version:
X.0.0
This theme provides support for Bootstrap 3. It also includes Font Awesome and utilizes Disqus for comments.
There are a few features that have been added to the theme, such as:
- Bootstrap Pagination
- Bootswatch Themes
- Theme Picker
- Disqus Comments
- Sidebar
- Font Awesome icon binding (for navbar links)
- Google Search
The Pagination for the Casper theme has been replaced by Bootstrap pagination.
Note: In order to provide advanced pagination, it was necessary to utilize JavaScript. This impacts search engine visibility of pages as the pagination does not expose search-engine friendly links. It is important that you submit your sitemap to search engines as outlined in the Ghost documentation (How do I submit my sitemap to Google?). In addition, it is recommended to use tags with each of your posts as this will assist with SEO.
The default Casper theme that this theme is based on utilizes meta tags for next and previous navigation, as well as other SEO support, so the lack of static HTML pagination may not be an issue overall.
There are a few different customizations supported for the pagination control.
In order to get the original pagination (which displays Page 1 of X), you will need to add the following code to your Code Injection in site settings (within a script block):
_cerkit.pagination.useSimplePagination = true;
Otherwise, your site will display a pagination control with 3 pages on either side of an ellipses (indicating there are pages in between the first and last pages). To change the number of pages surrounding the ellipses, you will need to add the following within a script block:
_cerkit.pagination.numbersSurroundingEllipses = 5;
If this value is set to -1 then it will display all page numbers on the control.
The Ghost Cerkit Theme uses CDNs whenever possible to eliminate the need to manually manage source files.
By default, the Ghost Cerkit Theme uses the Cosmo Bootswatch theme.
There is a theme selection control on the sidebar that allows the user to pick which theme they wish to display. To disable this theme picker on your site, simply add the following code within a script block in your Code Injection section in your site settings:
_cerkit.themeSelector.defaultTheme = 'united'; // or whatever your favorite theme is
_cerkit.themeSelector.showThemeSelector = false;
By selecting your default theme before turning off the theme selector, you are ensuring that every visitor will see the theme that you choose for your site.
The theme selector will store the selected theme in a cookie on the user's browser. It will then change the page to use their selected theme on each page load. It also provides a Theme Reset button that will return the site to its default theme.
To change the default theme for your site without modifying the source code, simply add the following code in your Code Injection within a script block:
_cerkit.themeSelector.defaultTheme = 'cosmo';
Note: when you change the theme via JavaScript code, a theme is loaded twice: once for the default site theme, and once for the theme chosen by the theme picker or the defaultTheme override. If you wish to permanently change your default theme, it is recommended that you alter the default.hbs source and change it there.
ghost-cerkit-theme implements the GTCA approach to configuration (for those items that are GTCA-compliant). It supports Google Analytics and Disqus integration so far, with social profile links coming soon. The best thing is, not a single bit of it requires you to hack around with the theme's files. It works right out of the box, and you can set it up however you like using the Ghost admin interface.
All theme configuration is done by adding one-line items to your Ghost blog header via the
code injection interface at yourblog.com/ghost/settings/code-injection.
Got a Google Analytics tracking ID? Instantly enable tracking on your blog by adding the following line to header code injection:
<script>window.__themeCfg.googleAnalyticsId = 'UA-12345678-1';</script>To add a Google search panel to your sidebar, create a custom search engine (Google Custom Search) and add the Google search id to your code injection (in the header):
<script>window.__themeCfg.googleSearchId = 'YOUR_GOOGLE_SEARCH_ID';</script>To integrate a ghost-cerkit-bootstrap blog with Disqus, you just need a Disqus username. Drop it into your configuration with this one line in the header code injection interface:
<script>window.__themeCfg.disqusUsername = 'mydisqususername';</script>Disqus threads will now appear on all of your posts.
This theme makes use of a sidebar partial.
If you'd like the sidebar to appear below the site contents, add the following to your code injection (in the header):
window.__themeCfg.useMobileSidebar = true;
This partial uses other partials to build a sidebar. The following components are included in the sidebar:
- Search Form - To set your search id, add the following to your code injection:
window.__themeCfg.googleSearchId = 'YOUR_GOOGLE_SEARCH_ID'; - A Sidebar Component Container - allows us to add components to the sidebar from other pages (in differing contexts)
- Bio Panel
- Sidebar Theme Picker
- SoundCloud widget - You can add a soundcloud widget by adding the following to your code injection header:
window.__themeCfg.soundcloudUserId = 'YOUR_SOUNDCLOUD_ID';. It is also possible to change the color (the default coor is Orange):window.__themeCfg.soundCloudWidgetColor = '006600';(note the absence of the Hash tag).
In order for the bio panel to work, an Author context has to be passed in for each page that uses it. Here is an example:
<div id="sidebar-container" class="col-md-4">
    {{#author}}
        {{> "sidebar"}}
    {{/author}}
</div>
The same is true for a context that does not have immediate access to the author context. Here is how we use the sidebar from the tags.hbs page:
<div id="sidebar-container" class="col-md-4">
    {{#posts.[0].author}}
	    {{> "sidebar"}}
    {{/posts.[0].author}}
</div>
It should be noted that the bio panel only shows the information for the author of the first post in this case. The bio panel should not be used on the sidebar for sites with multiple authors.
Because the sidebar runs in the Author context, it makes it difficult to add items that require other contexts to it in a dynamic fashion.
As an example, this theme has added a panel containing social media share buttons to the sidebar. However, this panel is not in the sidebar partial file.
Instead, it is defined in the post.hbs file at the bottom. It uses a hidden div to contain the elements that need to be copied to the sidebar.
The reason we had to define this share panel in the post page is because it relies on the context of the current post. By doing it this way, we can add whatever data we want to the element and then simply move it to the sidebar during the page ready handler.
For a div to be moved to the sidebar, it merely needs to add the sidebar-component css class.
<div class="hidden">
    <div class="panel panel-default sidebar-component">
        <div class="panel-body">
            <p>This will be in the sidebar...</p>
        </div>
    </div>
</div>
When the document ready handler fires, it will move everything on the page that is tagged with the sidebar-component class to the sidebar-component-container element:
$(document).ready(function () {
    // move items to the sidebar
    $('.sidebar-component').each(function () {
        $(this).detach().appendTo($('#sidebar-component-container'));
    });
});
It may be necessary for you to add icons to your nabar link items. Doing this is very easy with the theme. In the Footer section of the code injection page, simply add the following code:
<script type="text/javascript">
    // Navbar Icon Map
    _cerkit.navbar.linkIconMap.defaultIconSize = 'fa-lg'; //use whatever size you want, or, leave this blank for Font Awesome default
    _cerkit.navbar.addLinkIcon(/* target class = */ 'nav-home', /* icon = */ 'fa-home', /* (optional) size = */ 'fa-3x');
</script>
The first argument is the target class, this will match any element on the page with a given class name and bind the icon to it.
The next argument is the icon. This is the Font Awesome icon name to use.
The last argument is optional. It is the size you wish to use. If it is not provided, the system will use the default size defined in window.linkIconMap.defaultIconSize.
If that is not provided, then it will fall back to use the default Font Awesome size.
Check out the Bootstrap CSS documentation on how to modify built-in components of the site. If you need to override anything, you can do it in the src/assets/custom folder.
Please do not edit or change /dev/css/screen.scss (unless you find a bug with the master styles). Instead, to override the theme's styles or add your own, please edit the .scss (Sass) or .css files in the src/assets/custom folder. These files will be compiled and minified into a single file saved in /src/assets/custom.min.css and are linked in the main page after all other stylesheets.
Each of the scripts and css files are minified automatically by gulp (assuming you are running it while developing). The theme links to the app.min.js file.
Copyright (c) 2016 Michael Earls - Released under the MIT License Portions of this theme were adapted from the Casper theme - Copyright (c) 2013-2016 Ghost Foundation
Permission is hereby granted, free of charge, to any person obtaining a copy of this software and associated documentation files (the "Software"), to deal in the Software without restriction, including without limitation the rights to use, copy, modify, merge, publish, distribute, sublicense, and/or sell copies of the Software, and to permit persons to whom the Software is furnished to do so, subject to the following conditions:
The above copyright notice and this permission notice shall be included in all copies or substantial portions of the Software.
THE SOFTWARE IS PROVIDED "AS IS", WITHOUT WARRANTY OF ANY KIND, EXPRESS OR IMPLIED, INCLUDING BUT NOT LIMITED TO THE WARRANTIES OF MERCHANTABILITY, FITNESS FOR A PARTICULAR PURPOSE AND NONINFRINGEMENT. IN NO EVENT SHALL THE AUTHORS OR COPYRIGHT HOLDERS BE LIABLE FOR ANY CLAIM, DAMAGES OR OTHER LIABILITY, WHETHER IN AN ACTION OF CONTRACT, TORT OR OTHERWISE, ARISING FROM, OUT OF OR IN CONNECTION WITH THE SOFTWARE OR THE USE OR OTHER DEALINGS IN THE SOFTWARE.