RRduino: Setting and Testing a Sensor
Sensors are used for reading and writing to a PIN on your Arduino. For our example, I am going to put an LED on pin 9 and a Button on pin 4.
Change to the config tool directory
cd RR-duino/jmri-RR-duino
python3 ./pico-rr-duino-setup.py
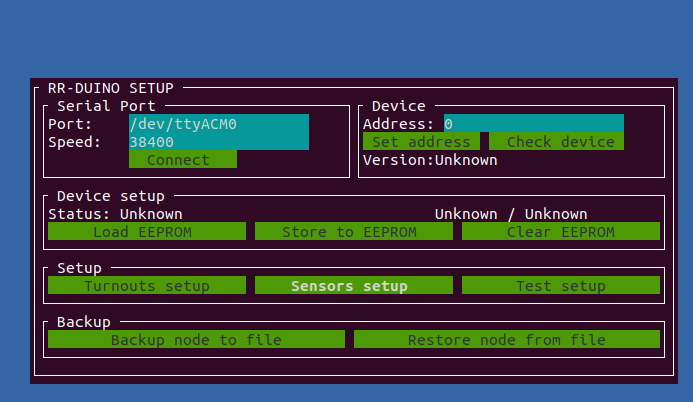
Now set the Port and Speed, the choose 'Connect'.
Before we set any sensors, always remember to load any previous setup from the node into the tool.
- Enter the Address for the node.
- Tab to 'Check device' and press Enter. The Status field should return OK.
- Tab to 'Load EEPROM' and press Enter to get the latest settings. If this is new, then nothing new will appear.
Enter into the Sensor Setup screen and configure your sensor.
- Tab to 'Sensor setup' and press Enter to go to the sensor setup screen.
All sensor have a SubAddress, PIN and type(input/output). For this example, PIN 9 will have an LED.
- Choose a Subaddress number. Eg. 1 in our case. Just needs to be unique for this node.
- Set the PIN value of 9.
- Choose 'output' from the list of types.
- Tab down to 'Commit sensor' and press Enter.
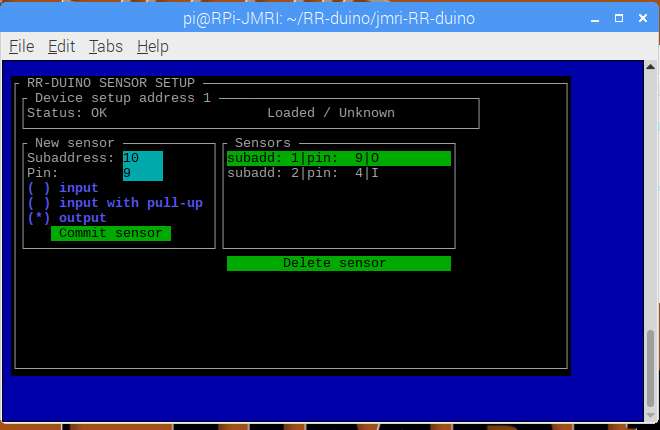
You should see your sensor appear in the list of Sensors.
Now we will create an Input sensor for our button.
- Choose a different Subaddress number, eg. 2.
- Set the PIN value of 4.
- Choose 'input' from the list of types.
- Tab down to 'Commit sensor' and press Enter.
Once you have all the sensors entered, press the 'Esc' button on your keyboard to return to the previous screen. Tab over to 'Store to EEPROM' and press Enter or you will lose these settings if the node loses power or restarts.
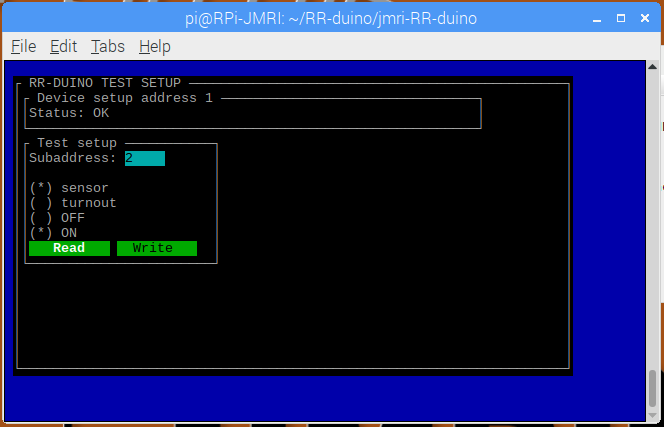
For this test, we will test subAddress 1 we setup as output for LED.
- On the main screen, tab to 'Test setup' and press Enter.
- Enter the Subadress you chose for your output sensor (eg. 1 = our LED)
- In the selection below, choose 'sensor' and choose 'ON'.
- Now tab down to 'Write' and press Enter. Your LED should turn on.
- Now tab back up, choose OFF, and then 'Write' again. The LED should turn off.
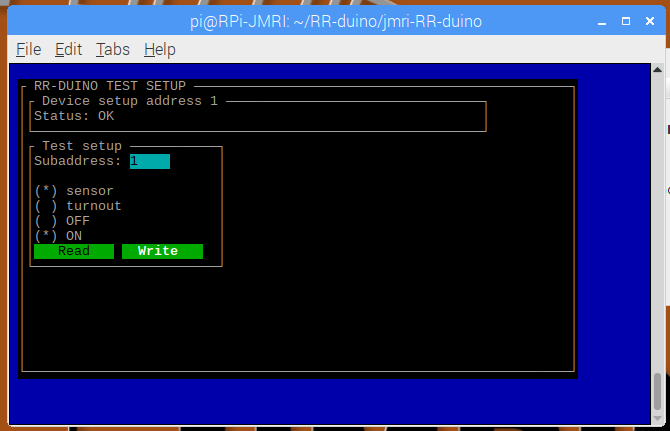
For this test, we will test subAddress 2 we setup as input for Button.
- Enter the subAddress of your input sensor (eg. 2 = our button)
- Choose the 'sensor' as type.
- Tab down to the 'Read' button and press Enter. The OFF should be selected.
- Now hold down the button on your Arduino and then select the 'Read' again. This time it should have the ON selected.
- Keep pressing the 'Read' button repeatedly while you click on and off your button.