Parking Lot Vacant Slot Information System Using Image Processing
Website
·
Report Bug
·
Team members
Table of Contents

Our project is about image processing for a parking lot system which keeps count of the available parking spots. It's done with integrated system made of RaspberryPi algorithm and Arduino board ESP32 . The system recognizes the available spots in the parking lot through a camera input that will then be processed by a deep learning image processing algorithm which output is used to monitor the parking lot situation in real time. A live monitoring is shown on a dedicated website which we made with simple CSS and HTML code. ESP32 and RaspberryPI bluetooth communication performs the function of raising and lowering the breaker (which is build with servo-motor) according to the parking lot situation. The information from the parking lot is shown on the website through web server which built on FLASK. The website displays a real-time footage of the parking lot along with the number of parking slots available. The information is updated every 5 seconds.

*Screenshot of real time footage*
default.mp4
Before starting this installation procedure, make sure you have the latest version of the Arduino IDE installed in your computer. If you don’t, uninstall it and install it again. Otherwise, it may not work.
To install the ESP32 board in your Arduino IDE, follow these next instructions:
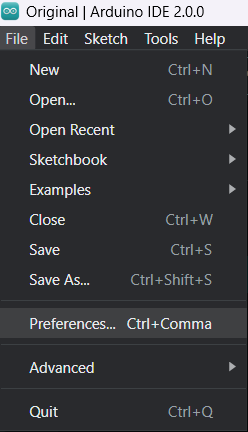
- In your Arduino IDE, go to File> Preferences
- Enter the following into the “Additional Board Manager URLs” field:
https://raw.githubusercontent.com/espressif/arduino-esp32/gh-pages/package_esp32_index.json
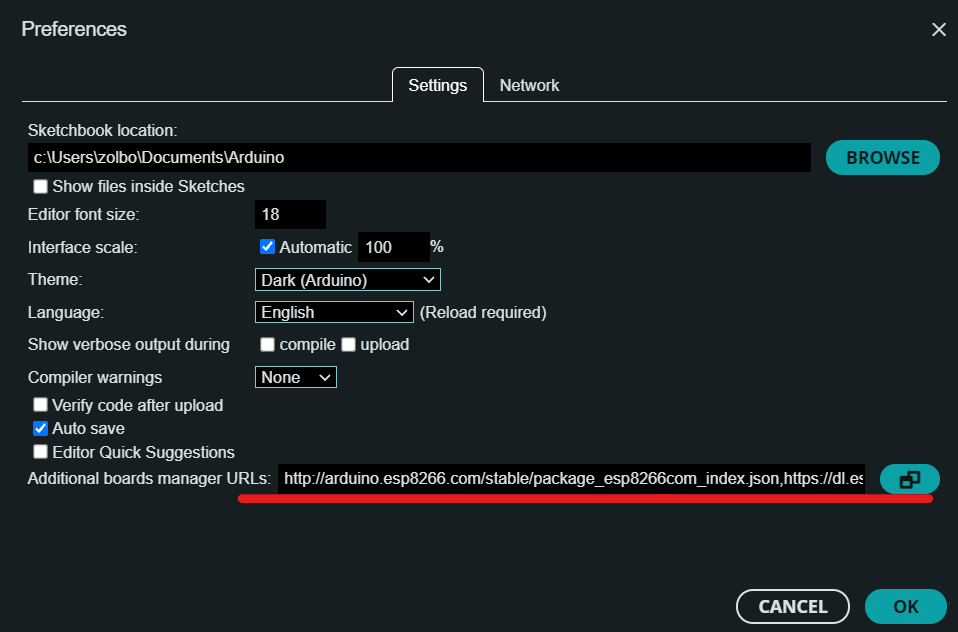
Then, click the “OK” button:
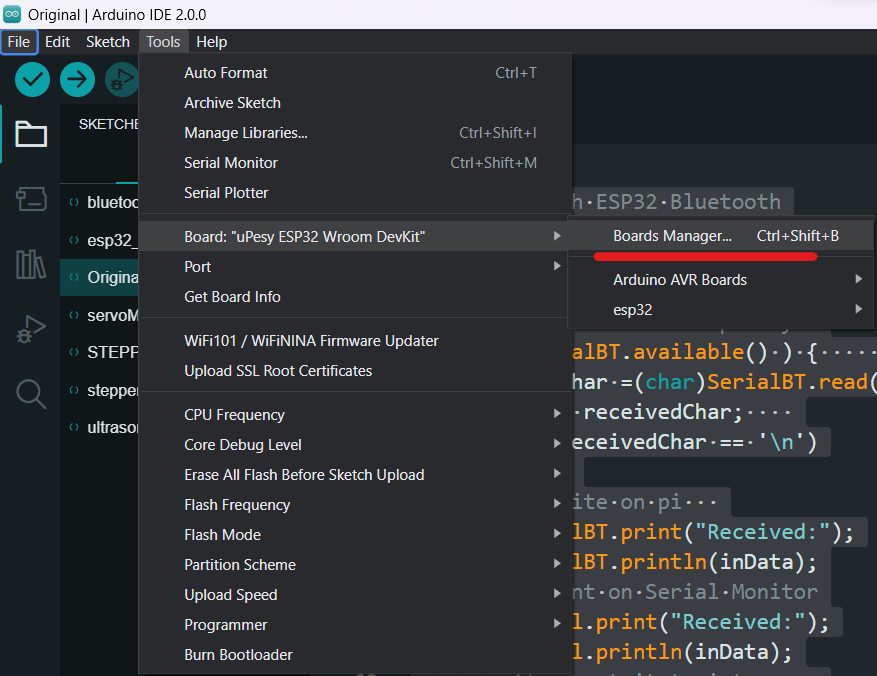
- Open the Boards Manager. Go to Tools > Board > Boards Manager…
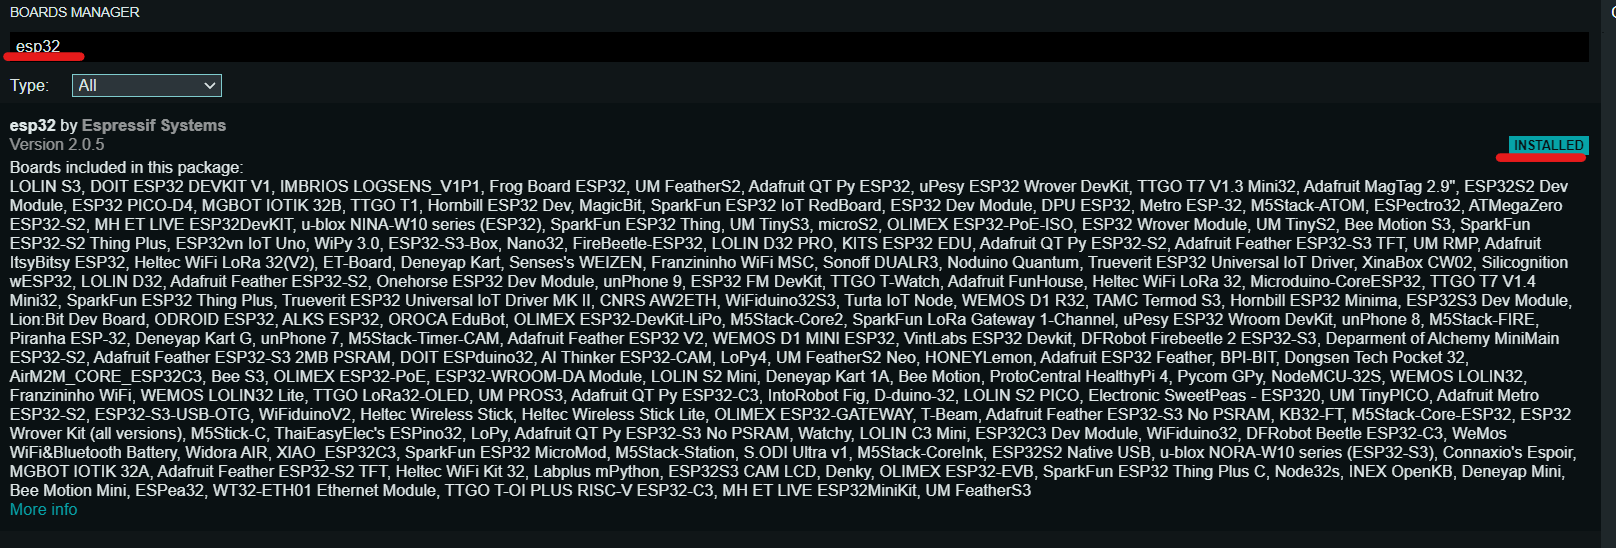
- Search for ESP32 and press install button for the “ESP32 by Espressif Systems“:
(See more)about how the gate works on ESP32
- Install pybluez for Python3, enter the command in Terminal:
$ sudo pip3 install pybluez
$ sudo apt install bluetooth bluez libbluetooth-dev- Put below python code in Raspberry Pi Thonny.
from bluetooth import *
def sendData():
    print("\nType something\n")
    while True:
        data = input()
        if len(data) == 0: break
        sock.send(data)
        sock.send("\n")
#MAC address of ESP32
addr = "24:0A:C4:E8:0F:9A"
service_matches = find_service( address = addr )

buf_size = 1024;

if len(service_matches) == 0:
    print("couldn't find the SampleServer service =(")
    sys.exit(0)

for s in range(len(service_matches)):
    print("\nservice_matches: [" + str(s) + "]:")
    print(service_matches[s])

first_match = service_matches[0]
port = first_match["port"]
name = first_match["name"]
host = first_match["host"]
port=1
print("connecting to \"%s\" on %s, port %s" % (name, host, port))

# Create the client socket
sock=BluetoothSocket(RFCOMM)
sock.connect((host, port))

print("connected")
sendData()
sock.close()For this version we have installed RaspberryPi operating system "Buster"
To install Raspberry PI OS Buster on Raspberry Pi Click here
- Run below code in the Terminal
$ sudo raspi-config- Set up the Display by following order
Display Options - Resolution - DMT Mode 51
- Input below code in order to install OpenCV
$ pip3 install opencv-python==4.5.1.48- Input below code in order to install Numpy
$ pip3 install numpy==1.20.2- Input below code in order to install the required libraries
$ sudo apt-get install libhdf-dev -y
$ sudo apt-get install libhdf-serial-dev -y
$ sudo apt-get install libatlas-base-dev -y
$ sudo apt-get install libjasper-dev -y
$ sudo apt-get install libqtgui4 -y
$ sudo apt-get install libqt4-test -y- Input below code in order to install TensorFlow
$ pip3 install tensorflow==1.14.0- Input below code in order to install Keras
$ pip3 install keras==2.2.5- Keras acts as an interface for the TensorFlow library.
- Input below code in order to install h5py
$ pip3 install h5py==2.10.0- The h5py package is a Pythonic interface to the HDF5 binary data format.
For Camera streaming server we are using mjpg-streamer
Put below codes in the Terminal in order
$ git clone https://github.com/jacksonliam/mjpg-streamer.git
$ cd mjpg-streamer
$ cd mjpg-streamer-experimental
$ sudo apt-get install libjpeg-dev
$ make CMAKE_BUILD_TYPE=Debug
$ sudo make install
After the installation of mjpg-streamer
We have to make shell executable file under name of "mjpg" following code will create the file
sudo nano mjpg.shFrom the mjpeg streamer folder:
export STREAMER_PATH=$HOME/mjpg/mjpg-streamer/mjpg-streamer-experimental
export LD_LIBRARY_PATH=$STREAMER_PATH
$STREAMER_PATH/mjpg_streamer -i "input_uvc.so" -o "output_http.so -w
$STREAMER_PATH/www"
export STREAMER_PATH=$HOME/mjpg/mjpg-streamer/mjpg-streamer-experimental
export LD_LIBRARY_PATH=$STREAMER_PATH
$ STREAMER_PATH/mjpg_streamer -i "input_raspicam.so" -o "output_http.so -w
$ STREAMER_PATH/www"
tombeom - tombeom@naver.com
Zolboo - zolboo.oz@gmail.com